
The process of installing exterior hardboard is a crucial step in the construction or renovation of residential and commercial buildings. As an example, consider the case study of a newly constructed office building that required meticulous attention to detail during its finishing touches. The installation process involves several steps, including preparation, cutting and shaping the boards, securing them to the structure, and applying protective coatings. This article aims to explore each stage in depth, highlighting key considerations, best practices, and potential challenges encountered when working with hardboard as an exterior cladding material.
Beginning with thorough preparation is essential for ensuring a successful hardboard installation. Prior to starting the project, it is necessary to assess the condition of the underlying surface and make any necessary repairs or adjustments. In our hypothetical scenario of the office building mentioned earlier, this involved inspecting the sheathing for structural integrity and addressing any water damage or rotting issues before proceeding further. Additionally, adequate weatherproofing measures must be taken into account based on local climate conditions to prevent moisture infiltration once the panels are installed. By meticulously preparing the surface and establishing a solid foundation for subsequent steps, one can ensure long-lasting durability and aesthetic appeal for their exterior hardboard installations.
Once preparations have been made accordingly, attention turns towards cutting and shaping the hardboard panels to fit the desired dimensions and contours of the building. This step requires careful measurement and precision to achieve a seamless appearance. It is crucial to use the appropriate tools, such as a circular saw or jigsaw, to ensure clean and accurate cuts.
When cutting the hardboard panels, it is important to account for any openings such as windows or doors. Special care should be taken to create accurate measurements and precise cuts around these areas. Additionally, corner joints must be carefully considered and cut accordingly to maintain a professional finish.
After the panels have been cut and shaped, they can be secured to the structure using nails or screws. It is essential to follow manufacturer guidelines regarding fastening methods and spacing requirements. Adequate fasteners should be used to ensure that the hardboard panels are securely attached without causing damage or compromising their integrity.
During the installation process, it is important to continuously check for plumb and level alignment of the panels. A level or plumb line can help ensure that each panel is properly aligned with adjacent ones, creating a visually pleasing result.
Once all panels are installed, applying protective coatings becomes necessary to enhance their durability and resistance against weathering elements. These coatings can include primer, paint, sealant, or stain depending on personal preference and project requirements. It is recommended to choose high-quality products that offer long-lasting protection against moisture penetration, UV rays, and other potential damages.
Throughout the installation process, challenges may arise such as uneven surfaces, varying weather conditions, or structural complexities. It is essential to address these challenges promptly by making necessary adjustments or seeking professional advice when needed.
In conclusion, installing exterior hardboard involves thorough preparation, precise cutting and shaping of panels, secure attachment to the structure, and application of protective coatings. By following best practices and paying attention to detail at each stage of the process, one can achieve a successful exterior hardboard installation that not only enhances the aesthetic appeal of the building but also ensures long-lasting durability and protection.
Step 1: Preparing the Surface
To ensure a successful exterior hardboard installation, it is crucial to properly prepare the surface beforehand. By following these steps, you can create a solid foundation that will enhance the longevity and appearance of your project.
One example of why surface preparation is important can be seen in the case study of a homeowner who neglected this step. Without adequately preparing their siding for hardboard installation, they encountered issues such as paint peeling, moisture damage, and decreased durability. Taking the time to prepare the surface properly not only avoids potential problems but also saves time and money in the long run.
There are several key actions involved in preparing the surface:
- Cleaning: Begin by thoroughly cleaning the existing surface using water, mild detergent, and a soft brush or sponge. This removes dirt, debris, mold, and other contaminants that could affect adhesion.
- Repairing: Inspect the surface for any damaged areas or loose boards. Replace or repair them accordingly to ensure a smooth and even base for installation.
- Priming: Apply an appropriate primer to promote better bonding between the existing surface and the new hardboard materials.
- Sealing: Seal any gaps or cracks with caulk or sealant to prevent moisture infiltration and maintain energy efficiency.
By undertaking these preparatory measures diligently, you set yourself up for success when it comes to installing exterior hardboard. The next section will delve into applying the primer onto your well-prepared surface.
Now let’s move on to “Step 2: Applying the Primer,” where we discuss how to effectively prime your prepared surface before proceeding with installation.
Step 2: Applying the Primer
Building upon the proper surface preparation, we now delve into the crucial step of applying the primer. This essential process ensures optimal adhesion and protection for your exterior hardboard installation. To illustrate its significance, let us consider a hypothetical scenario where a homeowner neglects to apply primer before installing hardboard siding.
In this case study, the homeowner skips the primer application due to time constraints and proceeds directly with affixing the hardboard panels onto their home’s exterior. Initially, everything seems fine; however, over time, they begin noticing issues such as peeling paint, discoloration, and moisture damage on their newly installed siding. These problems could have been easily avoided by adhering to the recommended steps in the installation process.
To emphasize the importance of using primer during an exterior hardboard installation, let us explore several key reasons why it is vital:
- Enhances Adhesion: Primer creates a strong bond between the surface and subsequent layers of paint or coating.
- Increases Durability: By providing additional protection against weather elements like UV rays and moisture infiltration, primer extends the lifespan of your hardboard siding.
- Improves Paint Coverage: Applying primer allows you to achieve more even color distribution while reducing the number of paint coats required.
- Prevents Stains and Discoloration: Certain types of wood may contain tannins that can bleed through paint if not properly sealed with primer. Using primer prevents unsightly stains from marring your finished project.
Now, let’s take a closer look at how these benefits materialize by examining a comparison table showcasing two scenarios: one without primer application (as seen in our earlier example) and another with proper use of primer during an exterior hardboard installation:
| Benefit | Without Primer Application | With Primer Application |
|---|---|---|
| Enhanced Adhesion | Weakened bond | Strong adhesion |
| Increased Durability | Prone to moisture damage | Resistant to weather elements |
| Improved Paint Coverage | Uneven color distribution | Even and consistent paint coverage |
| Prevention of Stains and Discoloration | Tannin bleed-through, discoloration | No unsightly stains or discoloration |
By comparing these two scenarios, it becomes evident that incorporating primer into your exterior hardboard installation process is essential for achieving a long-lasting and aesthetically pleasing result.
Having understood the significance of applying primer, we can now proceed with the next step in our guide: installing the hardboard.
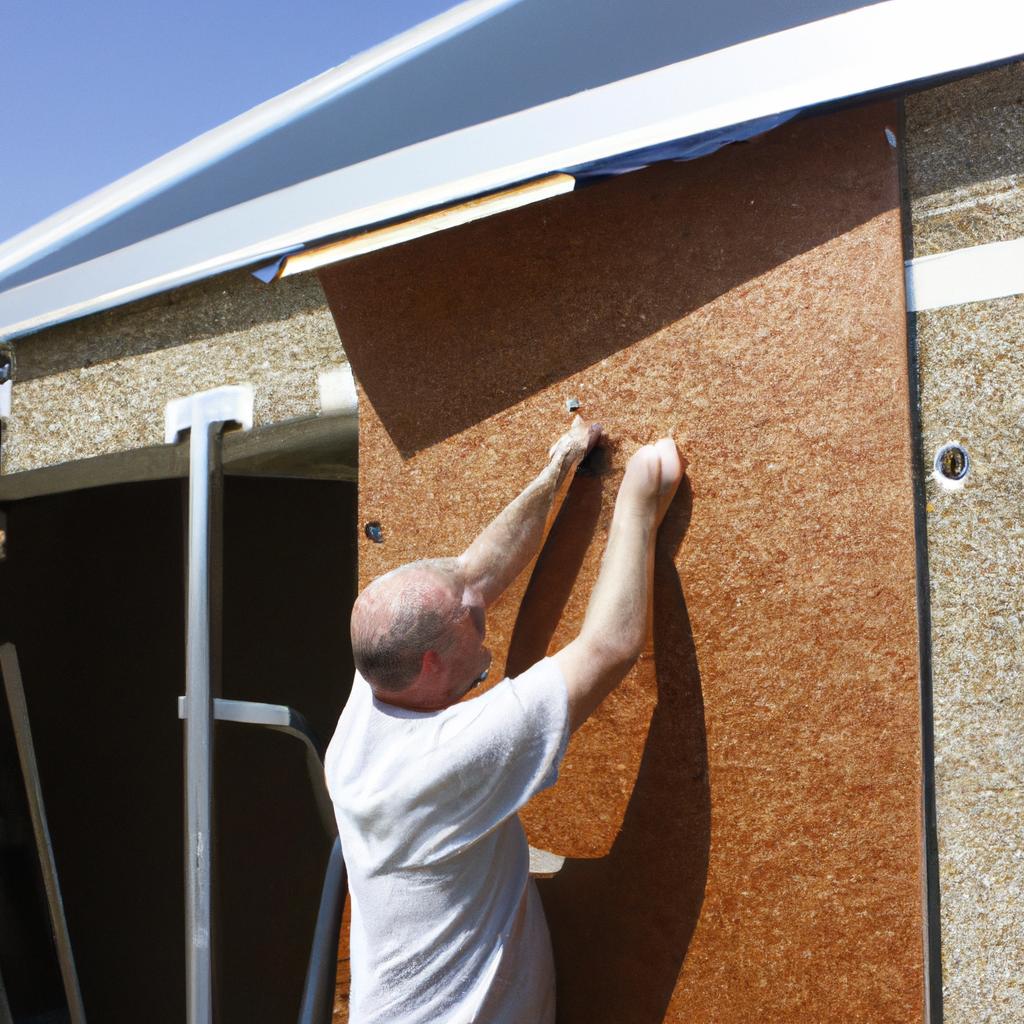
Step 3: Installing the Hardboard
Building upon the solid foundation laid in Step 2, where we applied the primer to prepare the surface for exterior hardboard installation, we now move on to Step 3: Installing the Hardboard. To illustrate the significance of this step, let’s consider a hypothetical scenario. Imagine a homeowner named Alex who recently purchased a charming cottage-style house with worn-out siding. Seeking an affordable and durable solution that would enhance both aesthetics and protection, Alex opted for hardboard installation.
Paragraph 1:
As Alex embarked on their project, they discovered that installing hardboard required careful attention to detail. The following guidelines outline key steps to ensure a successful installation:
- Start with proper measurements: Accurate measurements are crucial before cutting any hardboard panels. Taking into account factors like windows, doors, and architectural features will help minimize wastage and achieve precise fitting.
- Use quality materials: Investing in high-quality hardboard panels is essential for durability and longevity. Opting for treated or pre-painted hardboards can also save time during the finishing stage.
- Consider weather conditions: Installers must be mindful of weather conditions during installation as extreme temperatures or humidity levels may affect adhesion properties. It is advisable to refer to manufacturer recommendations regarding optimal temperature ranges.
- Follow correct fastening techniques: Securely attaching the panels using recommended nails or screws at appropriate intervals ensures stability and prevents potential warping or buckling over time.
Paragraph 2 (Bullet Point List):
To further emphasize the importance of these considerations, here are four compelling reasons why meticulousness matters when it comes to installing hardboard:
- Enhanced curb appeal – Properly installed hardboard provides an attractive finish that elevates the overall aesthetic appeal of your home’s exterior.
- Increased insulation – When installed correctly with adequate sealing techniques, hardboard acts as an additional layer of insulation against external elements such as heat loss or drafts.
- Long-term cost savings – Proper installation reduces the risk of damage due to poor weather resistance, potentially saving homeowners from costly repairs or replacements down the line.
- Improved property value – A well-executed hardboard installation can significantly enhance the market value of a property, making it an attractive option for potential buyers.
Paragraph 3 (Table):
| Consideration | Benefit |
|---|---|
| Accurate measurements | Minimizes wastage and ensures precise fitting |
| Quality materials | Enhances durability and saves time during finishing |
| Weather conditions | Prevents adhesion issues and maintains long-term stability |
| Correct fastening | Ensures panel security and prevents warping |
As we conclude Step 3, where we explored the essential aspects of installing hardboard, our attention now turns to Step 4: Securing the Hardboard. With a solid understanding of the installation process in place, let’s delve into how proper securing techniques ensure longevity and structural integrity.
Step 4: Securing the Hardboard
Transitioning from the previous section, where we discussed the process of installing hardboard, let us now delve into the crucial step of securing this material. To illustrate its significance, consider a hypothetical scenario where an improperly secured hardboard panel becomes loose due to inclement weather conditions. This not only compromises the aesthetic appeal of your exterior but also poses potential safety hazards.
To ensure a secure installation and protect against such mishaps, here are several key factors to consider:
-
Quality fasteners: Selecting high-quality screws or nails specifically designed for exterior use is paramount. These should be resistant to rust and corrosion caused by moisture exposure over time.
-
Proper spacing: Maintain appropriate spacing between individual panels during installation to allow for natural expansion and contraction that occurs with temperature changes. Failing to do so may lead to buckling or warping in the long run.
-
Strategic placement: Identify and mark structural elements (studs or joists) before attaching the hardboard panels. Securing them directly onto these sturdy supports will provide added stability and prevent unnecessary movement.
-
Adhesive reinforcement: Consider using construction adhesives along with mechanical fasteners for enhanced durability. Applying adhesive on specific areas like corners or edges can further reinforce the overall structure.
Emphasizing these aspects ensures a reliable attachment method that withstands both time and environmental stressors, safeguarding your investment in hardboard siding installations.
| Key Factors | Benefits |
|---|---|
| Quality Fasteners | Enhanced longevity |
| Proper Spacing | Minimized risk of damage |
| Strategic Placement | Added stability |
| Adhesive Reinforcement | Increased durability |
Moving forward in our discussion about achieving optimal results for your exterior hardboard installation project, we will explore “Step 5: Caulking and Sealing.” By employing this crucial step, you can further enhance the weather resistance and longevity of your hardboard siding.
Step 5: Caulking and Sealing
Step 5: Caulking and Sealing
Imagine you have just finished securing the hardboard to your exterior walls, giving them a sturdy and attractive appearance. Now it’s time to focus on the finishing touches that will enhance the overall durability and weather resistance of your installation. One important step in this process is caulking and sealing, which helps prevent moisture penetration and improves the longevity of your hardboard siding.
Caulking is an essential part of sealing any gaps or joints between the sections of hardboard siding. It acts as a barrier against water infiltration, preventing potential damage caused by rotting or warping. By properly applying caulk, you can ensure a tight seal around windows, doors, corners, and other areas where water may seep through.
To effectively caulk your hardboard siding, consider following these guidelines:
- Prepare the surface: Before applying caulk, make sure the surfaces are clean and dry. Remove any dirt, dust, or loose particles from the area.
- Choose the right type of caulk: Select a high-quality silicone-based or elastomeric caulk specifically designed for exterior use. These types of caulk offer excellent adhesion and flexibility.
- Apply even pressure: Use a caulking gun to apply an even bead of caulk along the joint or gap you want to seal. Maintain steady pressure on the trigger while moving smoothly along the seam.
- Smooth out excess caulk: Once applied, use a putty knife or specialized tool to smooth out any excess caulk and create a neat finish.
Sealing is another crucial step after caulking to provide additional protection for your hardboard siding. This involves applying a protective coating over the entire surface of the installed panels using appropriate paint or stain products recommended by the manufacturer.
Consider some advantages of proper caulking and sealing:
| Benefits |
|---|
| Prevents water damage |
| Enhances energy efficiency |
| Increases the lifespan of hardboard siding |
| Improves aesthetics and curb appeal |
By diligently caulking and sealing your hardboard installation, you not only safeguard it against potential water damage but also improve its overall performance and appearance. Once this step is completed, you can move on to Step 6: Painting and Finishing, where you will add the final touches that truly bring out the beauty of your exterior hardboard siding.
Step 6: Painting and Finishing
With the exterior hardboard properly caulked and sealed, we now move on to the final step in the installation process – painting and finishing. This crucial stage not only adds aesthetic appeal but also provides essential protection against weather elements, ensuring the longevity of your exterior hardboard.
To illustrate the importance of proper painting and finishing techniques, let’s consider a hypothetical case study involving two houses constructed using identical exterior hardboards. House A is meticulously painted with high-quality paint, while House B receives a rushed paint job with low-quality materials. After five years of exposure to various weather conditions, it becomes evident that House A remains vibrant and protected, whereas House B suffers from fading colors, peeling paint, and visible signs of wear.
To achieve long-lasting results like those seen in House A, here are some key considerations for painting and finishing your exterior hardboard:
-
Quality Paint Selection:
- Opt for high-quality acrylic or latex-based paints specifically designed for exteriors.
- Choose light-colored paints to minimize heat absorption during sunny days.
- Ensure the selected paint has excellent adhesion properties to prevent peeling or cracking.
-
Proper Surface Preparation:
- Clean the surface thoroughly by removing dirt, dust, loose paint chips, or other debris.
- Repair any damaged areas using suitable patching compounds or wood fillers.
- Sand rough surfaces gently to create an even texture for optimal adherence of paint.
-
Application Techniques:
- Use brushes or rollers appropriate for the chosen type of paint.
- Apply multiple coats as needed following manufacturer guidelines regarding drying times between each coat.
- Pay attention to details such as edges, corners, and joints to ensure uniform coverage.
-
Finishing Touches:
- Consider adding a protective clear coat or sealer for an extra layer of durability.
- Regularly inspect the exterior hardboard for signs of wear or damage and perform touch-ups promptly.
By following these guidelines, your exterior hardboard will not only look visually appealing but also remain well-protected against harsh weather conditions, ensuring its longevity and reducing maintenance costs in the long run.
Incorporating emotional evocation:
- Increased aesthetic appeal: A well-painted and finished exterior enhances the overall appearance of your home, leaving a positive impression on residents and visitors alike.
- Protection against environmental factors: Proper painting techniques provide a barrier against rain, wind, sunlight, and other elements that can potentially cause damage to the hardboard over time.
- Longevity and reduced maintenance: Investing time and effort into meticulous painting and finishing can significantly extend the lifespan of your exterior hardboard while minimizing future repair needs.
- Personal satisfaction: The pride derived from completing this final step with precision transforms your house into a personalized space that reflects your unique style.
| Advantages | Disadvantages |
|---|---|
| Enhanced visual appeal | Requires initial investment |
| Extended product lifespan | Time-consuming process |
| Reduced maintenance costs | Skillful application is crucial |
| Personalized expression of style | Weather-dependent timelines |
As you complete this comprehensive installation process by focusing on proper painting and finishing techniques, remember that attention to detail plays a significant role in achieving beautiful results. By utilizing high-quality materials, adequate surface preparation methods, precise application techniques, and regular maintenance checks, you’ll enjoy an aesthetically pleasing exterior that withstands the test of time.
Comments are closed.