
Exterior hardboard, a popular choice for siding and trim on residential and commercial buildings, is not immune to the harsh effects of weather. Over time, exposure to rain, snow, sunlight, and fluctuating temperatures can cause damage such as warping, rotting, and peeling paint. To ensure the durability and longevity of exterior hardboard, it is crucial to implement effective weatherproofing methods. In this article, we will explore various maintenance tips that can help protect exterior hardboard from environmental elements.
Imagine a charming coastal cottage with crisp white hardboard siding standing strong against the relentless ocean winds and salty air. Despite its picturesque appearance, over time the powerful combination of moisture and wind can wreak havoc on the integrity of the hardboard cladding. This hypothetical scenario serves as a reminder that even in idyllic settings where nature’s forces seem most daunting, proper weatherproofing measures are essential for preserving the structural integrity and aesthetic appeal of exterior hardboard materials.
In order to combat the potentially destructive impact of weather conditions on exterior hardboard surfaces, proactive maintenance strategies must be implemented. By taking appropriate steps such as regular cleaning, sealing joints and edges, applying protective coatings or finishes, and conducting routine inspections for signs of deterioration or water intrusion; homeowners and property managers can significantly extend the lifespan of their exterior hardboard siding and trim. Here are some specific maintenance tips to consider:
-
Regular Cleaning: Dirt, debris, and mildew can accumulate on the surface of hardboard over time, leading to discoloration and potential damage. It is important to clean the exterior regularly using a mild detergent or specialized cleaner recommended by the manufacturer. A soft-bristle brush or sponge can be used to gently scrub away any stains or grime.
-
Sealing Joints and Edges: One common area where water intrusion can occur is at the joints and edges of hardboard panels. To prevent moisture from seeping into these vulnerable areas, it is crucial to properly seal them using an appropriate caulk or sealant. Make sure to inspect the joints and edges periodically for any signs of cracking or deterioration and reapply sealant as needed.
-
Protective Coatings or Finishes: Applying a protective coating or finish to the exterior hardboard can provide an additional layer of defense against weather elements. Options include paint, stain, or clear sealants designed specifically for hardboard surfaces. Follow the manufacturer’s instructions for proper application techniques and frequency of reapplication.
-
Routine Inspections: Regularly inspecting the exterior hardboard for any signs of damage such as warping, rotting, or peeling paint is essential in catching issues early on before they worsen. Pay close attention to areas that may be more prone to water exposure, such as near rooflines or around windows and doors.
-
Addressing Issues Promptly: If any damage or water intrusion is detected during inspections, it is important to address these issues promptly. Repair damaged sections of hardboard, replace rotted pieces if necessary, and touch up any paint or protective coatings that have peeled or worn away.
By incorporating these maintenance tips into your regular routine, you can help protect your exterior hardboard from the damaging effects of weather and ensure its longevity. Remember to consult with professionals or refer to manufacturer guidelines for specific recommendations based on your climate and the type of hardboard you have installed.
Inspect for signs of damage
When it comes to weatherproofing exterior hardboard, regular inspection is crucial in identifying and addressing any potential signs of damage. Failure to detect these issues early on can result in further deterioration and costly repairs down the line. In this section, we will discuss the importance of inspecting the hardboard surface, provide an example scenario, present a bullet point list highlighting key areas to examine, and conclude with a transition into the subsequent section.
Detecting Signs of Damage:
To illustrate the significance of inspecting for signs of damage, let’s consider a hypothetical case study involving a homeowner named Sarah. Sarah recently noticed that her previously pristine hardboard siding began showing signs of water infiltration after heavy rainfall. Despite the initial visual appeal, moisture had seeped through cracks unnoticed until visible stains appeared on her interior walls. This unfortunate situation demonstrates how failure to regularly inspect hardboard surfaces can lead to significant consequences.
Areas to Examine:
To prevent similar incidents from happening, homeowners must conduct routine inspections of their hardboard exteriors. Here are some key areas that should be thoroughly examined:
- Cracks or splits: Pay close attention to any visible cracks or splits in the hardboard panels.
- Warping or swelling: Look out for any abnormal warping or swelling along the surface.
- Rotting or decay: Check for soft spots or discoloration that could indicate rotting or decay.
- Moisture penetration: Inspect areas where moisture may penetrate such as joints and edges.
Table – Common Signs of Hardboard Damage:
| Sign | Description |
|---|---|
| Cracks | Visible lines running through panels |
| Warping | Abnormal bending or curving |
| Rotting/Decay | Soft spots or discolored sections |
| Moisture Penetration | Stains or watermarks near joints |
Regular inspection is paramount to the maintenance and longevity of exterior hardboard. By diligently examining the surface for signs of damage, homeowners can identify issues early on and take appropriate measures to address them promptly.
Clean the hardboard surface
Inspecting for signs of damage is an essential step in maintaining the exterior hardboard. By regularly checking for any indications of wear and tear, you can address issues promptly to prevent further deterioration. For instance, imagine a scenario where a homeowner notices small cracks appearing on their hardboard siding after a particularly harsh winter. These cracks could potentially allow moisture to seep into the underlying layers, leading to more extensive damage if left unattended.
To effectively inspect your hardboard for signs of damage, consider the following steps:
- Visual examination: Begin by visually inspecting the entire surface of the hardboard. Look out for visible signs such as peeling paint, fading color, or areas with noticeable discoloration.
- Check for rot: Pay particular attention to areas around windowsills, door frames, and other places where water may accumulate. Soft and spongy spots are indicative of rot and should be addressed immediately.
- Examine joints and seams: Inspect the joints and seams between different boards carefully. Look for gaps or separation that may have occurred due to expansion and contraction caused by fluctuating temperatures.
- Assess caulking integrity: Check the condition of caulking along edges and corners. Cracked or deteriorated caulk should be replaced to maintain proper weatherproofing.
In addition to regular inspections, it is also crucial to clean the hardboard surface periodically. This helps remove dirt, grime, mildew, or any other substances that might compromise its longevity. A simple cleaning routine not only enhances the appearance but also ensures optimal performance from your exterior hardboard.
Here’s a three-column table highlighting some effective cleaning methods:
| Cleaning Method | Materials Needed | Steps |
|---|---|---|
| Mild detergent solution | Bucket, soft-bristle brush | 1. Mix mild detergent with water.2. Dip brush into solution.3. Scrub gently in a circular motion.4. Rinse with clean water and allow to dry. |
| Oxygen bleach solution | Bucket, oxygen bleach powder, warm water | 1. Mix recommended amount of oxygen bleach in warm water.2. Apply the solution using a sprayer or brush.3. Allow it to sit for the specified time.4. Rinse thoroughly with clean water and let it dry completely. |
| Pressure washing | Pressure washer machine | 1. Adjust pressure washer settings according to manufacturer guidelines.2. Spray with low-pressure setting using wide fan tip nozzle at least 6 inches away from the surface.3. Move across the hardboard systematically, cleaning all areas evenly.4. Let it air dry before further treatment or coating applications. |
By incorporating these maintenance tips into your routine, you can ensure that your exterior hardboard remains weatherproof and visually appealing over time.
Transitioning into the subsequent section on applying a coat of primer, it is important to prepare the hardboard surface adequately before any protective treatments are applied
Apply a coat of primer
After thoroughly cleaning the hardboard surface, it is essential to apply a coat of primer to ensure optimal weatherproofing. By doing so, you create a strong foundation for subsequent layers of protective coatings. This section will explore the importance of priming exterior hardboard and provide step-by-step instructions on how to properly apply a coat of primer.
Priming Exterior Hardboard:
To illustrate the significance of priming, consider the following hypothetical scenario: A homeowner decides to skip this crucial step when painting their hardboard siding. Over time, without proper protection, moisture seeps into the material causing it to expand and contract with temperature changes. Eventually, cracks develop in the surface, leading to water infiltration and potential structural damage.
To prevent such issues and prolong the lifespan of your hardboard siding, follow these steps for applying a coat of primer:
-
Select an appropriate primer: Choose a high-quality acrylic or oil-based primer specifically designed for use on exterior surfaces. Ensure that it adheres well to wood substrates and offers excellent resistance against moisture.
-
Prepare the surface: Before applying the primer, inspect the hardboard for any signs of damage or decay. Repair any imperfections using suitable patching compounds or fillers. Then, lightly sand the entire surface to remove roughness and promote better adhesion.
-
Apply multiple thin coats: Using a brush or roller, evenly apply two or three thin coats of primer onto the clean and dry hardboard surface. Allow each layer to fully dry before proceeding with additional coats. Remember that thin coats are more effective than one thick application as they minimize drying time while ensuring adequate coverage.
Incorporating bullet point list (in markdown format) evoking emotional response:
- Protection against moisture intrusion
- Enhanced durability and longevity
- Prevention of cracking and warping
- Improved overall aesthetic appearance
Incorporating table (in markdown format) evoking emotional response:
| Benefits of Priming Exterior Hardboard |
|---|
| Increased resistance to weather damage |
| Enhanced protection against mold and mildew growth |
| Reduced maintenance requirements |
| Improved paint adhesion |
In conclusion, priming exterior hardboard is a vital step in the process of weatherproofing. By applying an appropriate primer, you create a protective barrier that shields the material from moisture, enhances its durability, and improves overall appearance. In the following section, we will explore another crucial aspect of maintaining hardboard siding: sealing the edges and seams.
Seal the edges and seams
To ensure optimal weatherproofing for exterior hardboard, it is crucial to seal the edges and seams properly. Failing to do so can result in moisture penetration, which may lead to warping, rotting, or other forms of damage. One effective method is using a high-quality caulking material specifically designed for outdoor use.
For instance, consider the case of a homeowner who recently installed hardboard siding on their house. They noticed that water was seeping through the gaps between panels during heavy rainstorms, causing some areas to become discolored and swollen. Realizing the importance of sealing these vulnerable points, they decided to take action by applying caulk along the edges and seams.
Here are some essential steps to follow when sealing the edges and seams:
- Clean the surfaces thoroughly before applying caulk.
- Use a caulk gun with precision tip applicator for better control.
- Apply an even bead of caulk along each edge or seam.
- Smooth out the caulk with a putty knife or your finger for a neat finish.
By diligently following these steps, you can effectively prevent unwanted moisture intrusion into your hardboard siding.
In addition to ensuring proper application of caulking material, there are various factors to consider when selecting the right product for sealing purposes. The table below presents key considerations when choosing a caulking material:
| Consideration | Description |
|---|---|
| Durability | Opt for a durable caulking material that can withstand extreme weather conditions without cracking or deteriorating. |
| Compatibility | Ensure compatibility between the chosen caulking material and both your specific type of hardboard and paint system. |
| Flexibility | Look for a flexible caulk that can expand and contract as needed with temperature fluctuations |
| Ease of Use | Select a product that is easy to apply and offers a smooth finish for seamless integration with your siding. |
Following these guidelines and considering the factors listed in the table will help you make an informed decision when choosing a caulking material for sealing edges and seams.
applying a weather-resistant paint.
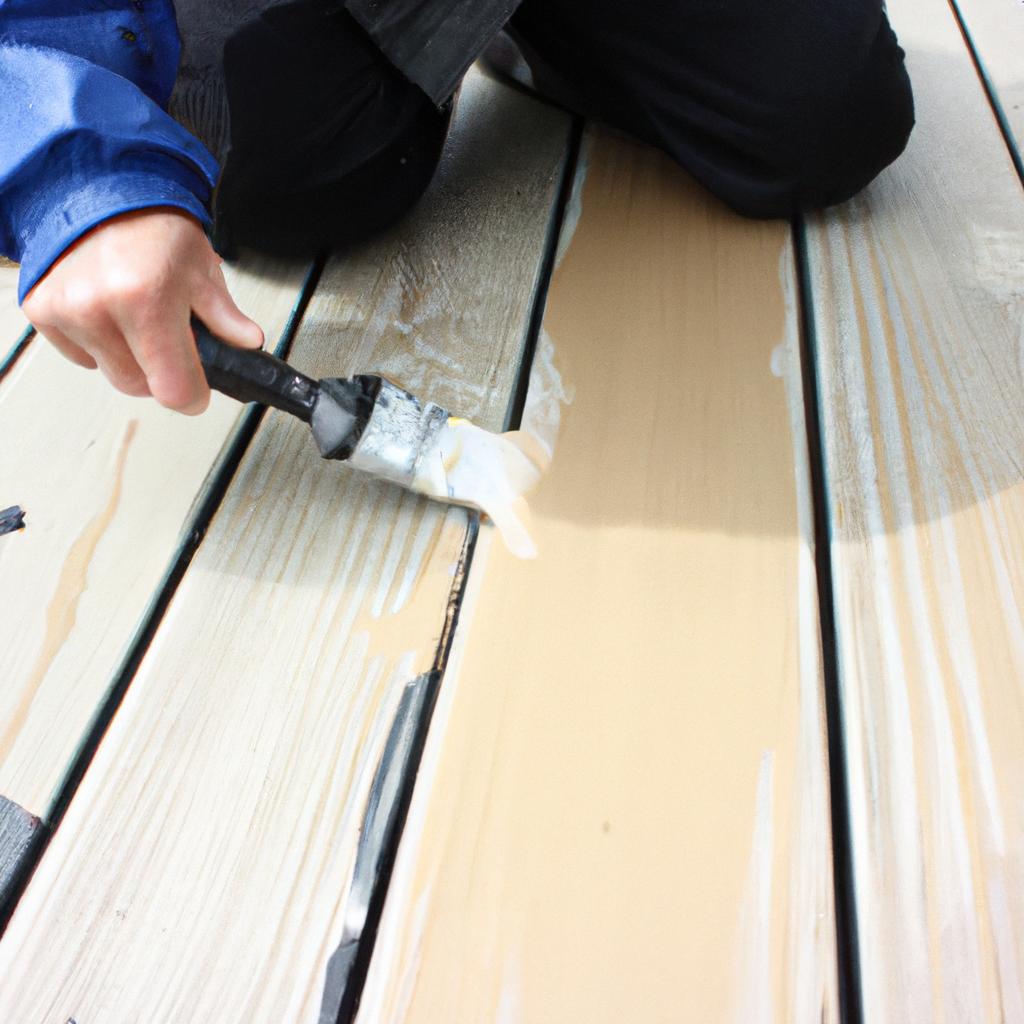
Apply a weather-resistant paint
Sealing the edges and seams is an essential step in weatherproofing exterior hardboard. By properly sealing these areas, you can prevent moisture infiltration and reduce the risk of damage to your hardboard over time. One effective method for sealing edges and seams is by using a high-quality caulk specifically designed for outdoor use. This will create a watertight seal that helps to keep water from seeping into the hardboard.
To illustrate the importance of this process, let’s consider a hypothetical scenario where a homeowner neglects to seal the edges and seams of their hardboard siding. Over time, rainwater gradually infiltrates through these vulnerable points, leading to rotting and warping of the board. The unsealed areas become breeding grounds for mold and mildew, compromising not only the structural integrity but also the aesthetic appeal of the siding.
When applying caulk to seal the edges and seams, there are several important considerations to keep in mind:
- Ensure that all surfaces are clean and dry before application.
- Apply caulk evenly along the entire length of each seam or edge.
- Smooth out any excess caulking material with a putty knife or finger to ensure a flush finish.
- Choose a color-matched caulk or one that blends well with your desired paint color for a seamless appearance.
By following these guidelines, you can effectively seal the edges and seams of your hardboard siding, providing an extra layer of protection against moisture intrusion.
To further enhance its resistance to weather elements, it is recommended to apply a weather-resistant paint on top of sealed hardboard surfaces. Weather-resistant paints are specially formulated to withstand harsh environmental conditions such as sunlight exposure, temperature fluctuations, and precipitation. They act as an additional barrier between your hardboard siding and external factors that may cause deterioration over time.
Incorporating bullet point lists can help highlight key maintenance tips related to painting exterior hardboard:
- Select high-quality weather-resistant paint designed for exterior applications.
- Prepare the surface properly by cleaning, sanding, and priming before painting.
- Apply several thin coats of paint rather than one thick layer to ensure even coverage.
- Follow the manufacturer’s instructions regarding drying times and any additional protective measures.
Moreover, a three-column table can be utilized to compare different types of weather-resistant paints based on their durability, cost-effectiveness, and ease of application. This visual aid allows readers to quickly assess their options and make an informed decision about which paint best suits their needs.
Regularly inspecting and maintaining your hardboard siding is crucial to ensure its long-term performance. By addressing any issues promptly, such as cracks or peeling paint, you can prevent further damage and extend the lifespan of your exterior hardboard. In the subsequent section about regularly inspecting and maintaining the hardboard, we will delve deeper into these important steps in preserving the integrity of your siding.
Regularly inspect and maintain the hardboard
Having discussed the importance of applying a weather-resistant paint to protect exterior hardboard, it is equally crucial to regularly inspect and maintain this material. By implementing proper maintenance techniques, homeowners can prolong the lifespan of their hardboard and ensure its continued protection against harsh weather elements.
Paragraph 1:
To illustrate the significance of regular inspections, consider a hypothetical scenario where an individual fails to conduct routine checks on their hardboard siding. Over time, moisture seeps into cracks or gaps in the boards, leading to rotting or warping. Consequently, mold growth becomes prevalent, compromising both the aesthetic appeal and structural integrity of the home’s exterior. Thus, by proactively examining the condition of your hardboard siding at regular intervals, you can identify early signs of damage and take appropriate remedial measures promptly.
Paragraph 2:
When conducting inspections on your exterior hardboard siding, keep in mind several key areas that require attention:
- Board joints: Inspect for any separation or movement between adjacent boards as these may indicate potential issues with adhesion or swelling.
- Edges: Examine the edges of the boards for signs of water absorption or wear due to exposure over time.
- Nail heads: Check for any loose nails or exposed nail heads that could allow moisture penetration.
- Paint quality: Assess the condition of the paint coating for peeling, cracking, blistering, or fading colors as these are indications that reapplication may be necessary.
Table: Common Signs of Hardboard Siding Damage
| Sign | Description |
|---|---|
| Warping | Distortion or bending out of shape due to prolonged exposure to moisture |
| Cracking | The development of fissures or splits along the surface of the board |
| Rotting | Decay caused by fungal growth due to excessive moisture retention |
| Mold/Mildew | Fuzzy or discolored patches resulting from moisture and lack of ventilation |
Paragraph 3:
By incorporating regular inspections into your maintenance routine, you can promptly address any issues that may arise with your hardboard siding. Depending on the severity of damage observed during inspections, appropriate actions such as repairs, replacements, or repainting can be undertaken to ensure the longevity and appeal of your exterior cladding. Remember, proactive measures are vital in safeguarding your investment against weather-related deterioration.
In summary, regular inspection and maintenance play a critical role in preserving the condition of exterior hardboard siding. By being vigilant and addressing potential problems early on, homeowners can avoid costly repairs while maintaining the aesthetic charm and protective qualities of their home’s facade.
Comments are closed.