
In the realm of exterior construction, accurate measurement and precise marking are crucial steps in ensuring a successful installation process. Whether it is for siding, trim, or other hardboard applications, meticulous attention to detail becomes paramount when working with these materials. For instance, consider a hypothetical scenario where an individual decides to install hardboard panels on the exterior walls of their home. Without proper measurement and marking techniques, they may encounter issues such as misaligned seams or unevenly spaced boards, resulting in a visually unappealing and structurally compromised end result.
This article aims to provide readers with a comprehensive guide on measuring and marking during the exterior hardboard installation process. By adhering to best practices outlined herein, individuals can enhance their understanding of key concepts while acquiring essential skills necessary for achieving professional-level craftsmanship. Moreover, this article will explore various tools commonly utilized in this phase of the installation process and discuss effective strategies for accurately measuring lengths and angles. Additionally, it will delve into different types of markings used to indicate cut lines and fastener locations, emphasizing their importance in facilitating seamless integration between hardboard components. Through careful examination of these fundamental principles, both novice DIY enthusiasts and seasoned professionals alike can elevate their expertise in executing flawless installations that withstand the test of time.
Understanding the importance of measuring accurately
Understanding the Importance of Measuring Accurately
Accurate measurement is a crucial aspect of any exterior hardboard installation process. Without precise measurements, the entire project can be at risk of failure and costly mistakes. To emphasize this point, let us consider a hypothetical scenario where inaccurate measurements were taken during an exterior hardboard installation.
Imagine a homeowner named John who decided to install hardboard siding on his house without paying much attention to accurate measuring techniques. He disregarded the importance of taking precise measurements and proceeded with the installation based on rough estimates alone. As a result, he ended up with misaligned panels that did not fit properly, leaving gaps in between them. This compromised both the aesthetic appeal and functionality of his home’s exterior.
To avoid such unfortunate situations, it is essential to understand why accurate measuring matters when installing hardboard siding. Here are some key reasons:
- Proper Fit: Accurate measurements ensure that each panel fits snugly against adjacent ones, leaving no visible gaps or irregularities.
- Weather Resistance: Precise sizing helps create tight joints and minimize exposure points for moisture infiltration, enhancing the overall weather resistance of the installation.
- Longevity: When installed correctly using accurate measurements, hardboard siding will have better structural integrity and durability over time.
- Enhanced Aesthetics: Properly measured and aligned panels contribute to a visually pleasing façade by maintaining consistent patterns and alignments.
Consider the following table as an illustration:
| Inaccurate Measurements | Accurate Measurements | |
|---|---|---|
| 1 | Ill-fitting panels | Panels align perfectly |
| 2 | Increased water damage | Improved weather resistance |
| 3 | Reduced lifespan | Enhanced durability |
| 4 | Unattractive appearance | Consistent visual appeal |
In conclusion, understanding the importance of measuring accurately sets the foundation for a successful exterior hardboard installation. By taking precise measurements, homeowners can ensure a proper fit, enhance weather resistance, increase longevity, and achieve an aesthetically pleasing outcome. With these factors in mind, let us move on to the next section: preparing the exterior surface for hardboard installation.
Preparing the exterior surface for hardboard installation
Section H2: Preparing the Exterior Surface for Hardboard Installation
Transitioning smoothly from the previous section on understanding the importance of measuring accurately, let’s now delve into the crucial step of preparing the exterior surface before proceeding with hardboard installation. To illustrate this process, let us consider a hypothetical case study involving a homeowner named Sarah who wants to revamp her house’s façade by installing hardboard siding.
Before jumping into action, Sarah must ensure that her exterior surface is ready to receive the new hardboard. This involves several key steps:
-
Cleaning and Repairing:
Sarah begins by thoroughly cleaning her exterior walls using a mild detergent and water solution, effectively removing any dirt, dust, or debris accumulated over time. She pays special attention to areas prone to moisture buildup such as corners and joints. Once cleaned, she inspects the walls for any signs of damage or decay, repairing them promptly if necessary. By ensuring a clean and structurally sound surface, Sarah sets herself up for successful hardboard installation. -
Applying Primer:
To enhance adhesion and protect against moisture infiltration, Sarah applies a high-quality primer specifically designed for use on wood composites like hardboard. The primer acts as a barrier between the substrate and the final finish coat of paint or stain. By taking this extra step in preparation, Sarah ensures longevity and durability for her newly installed hardboard siding. -
Checking for Levelness:
Next, Sarah uses a level tool to examine her wall surfaces carefully—both horizontally and vertically—to ensure they are straight and plumb respectively. Any irregularities can be addressed at this stage through techniques such as shimming or sanding down uneven spots. Achieving an even plane guarantees a professional-looking end result while aiding in accurate measurements during subsequent stages of installation. -
Weatherproofing Measures:
Finally, Sarah takes proactive measures to safeguard her home against weather elements by applying appropriate sealants around windows, doors, and other vulnerable areas. This helps prevent water penetration and subsequent damage to the hardboard siding, ensuring long-lasting protection for her house.
Through these essential preparatory steps, Sarah lays the foundation for a successful hardboard installation project. By investing time and effort into surface preparation, she ensures that her new siding will not only look aesthetically pleasing but also withstand the test of time.
- Increased curb appeal: A well-prepared exterior surface creates a visually appealing façade that can enhance property value.
- Protection against moisture damage: Proper cleaning, repair, and application of primer provide vital defense mechanisms against potential water infiltration and rotting issues.
- Longevity and durability: Consistent leveling efforts contribute to a structurally sound installation with minimized risks of warping or bending over time.
- Peace of mind: Taking weatherproofing measures offers homeowners reassurance that their investment is safeguarded against harsh environmental conditions.
Furthermore, we can include a table showcasing different types of sealants available for weatherproofing purposes:
| Sealant Type | Key Features | Suitable Applications |
|---|---|---|
| Silicone | Excellent flexibility and UV resistance | Windows, doors |
| Polyurethane | Superior adhesion and high tensile strength | Joints, gaps |
| Acrylic | Easy cleanup and paintability | Siding edges |
| Butyl Rubber | Exceptional waterproofing capabilities | Flashings |
As we move forward to discussing the tools and materials needed for the marking process in the next section, it becomes clear how crucial proper surface preparation is in achieving optimal results. The combination of accurate measurements alongside thorough cleaning, leveling checks, primer application, and weatherproofing measures sets the stage for efficient hardboard installation.
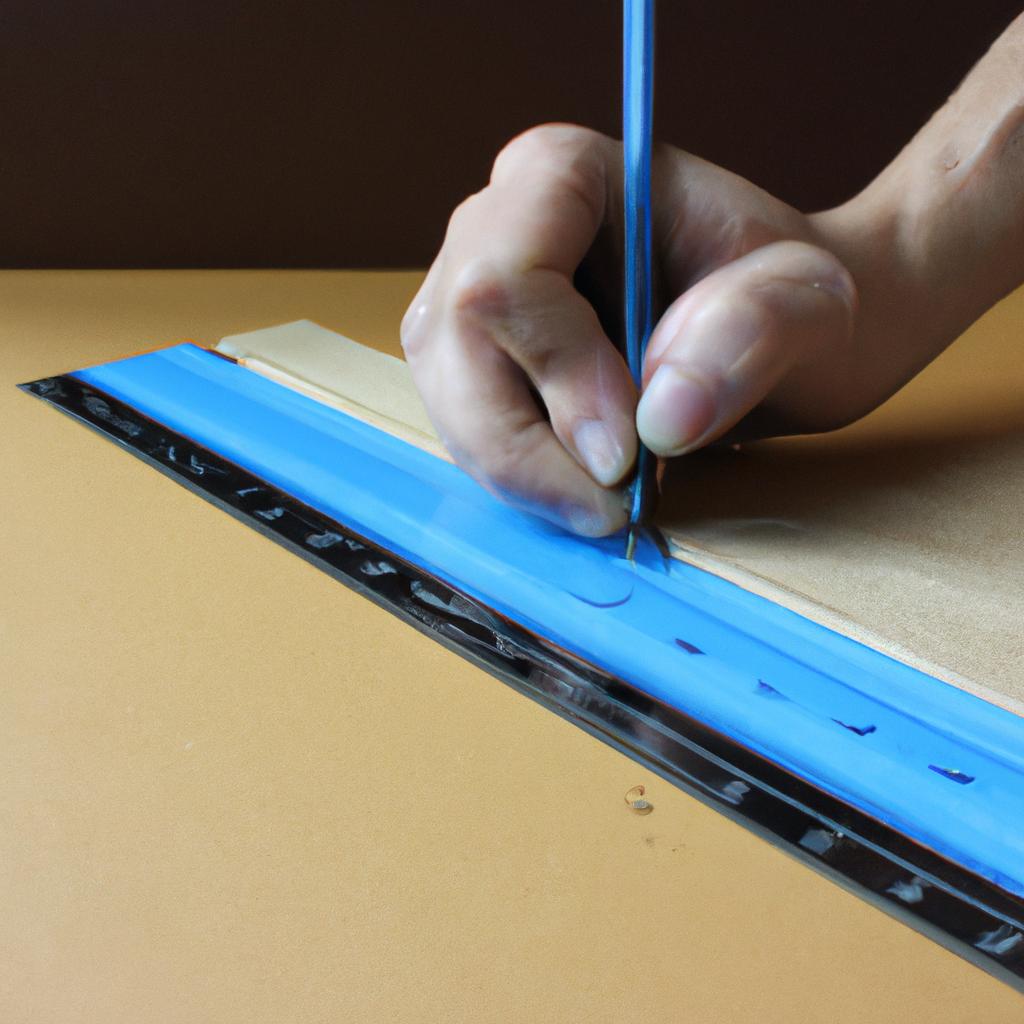
Tools and materials needed for the marking process
Imagine a scenario where you have carefully prepared the exterior surface for hardboard installation. You are now ready to move on to the crucial step of measuring and marking the panels. This process is vital as it ensures precise placement and alignment, resulting in a professional and visually appealing outcome.
To begin with, let’s explore some key considerations when measuring and marking hardboard panels:
-
Accuracy: Achieving accurate measurements is essential to ensure proper fitting and avoid any discrepancies or gaps between panels. Utilize high-quality measuring tools such as tape measures or laser levels to obtain precise dimensions.
-
Panel Orientation: Before making any cuts or marks, determine how the panels will align on your exterior surface. Consider factors like the desired pattern, visual appeal, and structural integrity of your design.
-
Marking Techniques: There are several methods for marking hardboard panels effectively. Some commonly used techniques include using chalk lines, straight edges, or carpenter pencils to create clear guidelines that guide you during installation.
-
Safety Precautions: Always prioritize safety while working with tools and materials. Wear appropriate protective gear such as gloves and goggles to prevent injuries during cutting or handling of the boards.
Now that we have explored these important considerations, let us delve into a practical demonstration through a table showcasing four effective marking techniques:
| Marking Technique | Description | Suitable For |
|---|---|---|
| Chalk Lines | Using string coated in chalk dust | Large projects requiring long lines |
| Straight Edges | Rigid guides made from metal or plastic | Precise measurements along one edge |
| Carpenter Pencil | Flat pencil ideal for creating fine markings | Detailed work requiring accuracy |
| Stencils | Predesigned templates for consistent patterns | Repetitive designs with uniform shapes |
In summary, accurately measuring and marking hardboard panels is a crucial step in the installation process. Consider factors such as accuracy, panel orientation, marking techniques, and safety precautions to ensure optimal results. With these considerations in mind, let us now proceed to the subsequent section that will guide you through a step-by-step process for measuring and marking your hardboard panels.
[Transition Sentence]: Now equipped with an understanding of key considerations for accurate measurements and markings, we can move on to the next section that provides a comprehensive step-by-step guide to measure and mark hardboard panels effectively.
Step-by-step guide to measuring and marking hardboard panels
Imagine you have just purchased a new house, and the exterior walls are in need of an upgrade. Installing hardboard panels can be a cost-effective solution that enhances both the appearance and durability of your home’s exterior. However, to ensure a successful installation process, precise measuring and accurate marking are crucial. In this section, we will outline a step-by-step guide to help you measure and mark hardboard panels effectively.
To begin with, gather all the necessary tools and materials for the marking process. These may include a measuring tape, pencil or chalk line, leveler or laser level, straightedge or T-square, as well as safety equipment such as gloves and goggles. Having these items readily available will streamline your work and minimize interruptions during measurement.
Once equipped with the appropriate tools, follow these steps closely:
- Measure twice before making any marks: Accurate measurements are essential for ensuring proper panel alignment. Double-check each measurement to reduce errors caused by oversight.
- Use a leveling tool: Whether it is a traditional spirit level or modern laser level, utilizing one will help maintain uniformity throughout your project.
- Create guidelines with precision: Utilize straightedges or T-squares to establish clear lines on your wall surface that serve as guides for cutting and installing panels.
- Consider panel overlap options: Depending on your desired aesthetic outcome, decide whether you want panels to butt against each other tightly or leave some room for expansion due to weather changes.
By following these steps diligently, you can lay the foundation for an impeccable hardboard installation job that stands the test of time. With precise measurements, accurate markings, and careful planning in place, you are now ready to move forward into the next stage – Tips for ensuring precise and symmetrical cuts.
Please transition smoothly from here into “Tips for ensuring precise and symmetrical cuts” where we discuss the best practices for cutting hardboard panels.
Tips for ensuring precise and symmetrical cuts
Building upon the previous section’s step-by-step guide to measuring and marking hardboard panels, let us now explore some valuable tips for ensuring precise and symmetrical cuts. To illustrate these principles in action, consider the following scenario:
Example: Imagine a homeowner, Sarah, who is installing hardboard panels on the exterior of her house. She carefully measures and marks each panel according to the guidelines provided in the previous section. However, when it comes time to cut the panels, she encounters challenges that result in uneven edges and an overall unsatisfactory installation.
To avoid similar issues and achieve professional-looking results, keep in mind these practical suggestions:
-
Use high-quality tools: Investing in reliable cutting tools such as circular saws or jigsaws with sharp blades can significantly impact the precision of your cuts. Dull blades or inadequate equipment may lead to rough edges or inaccurate measurements.
-
Double-check measurements: Even a slight error during measurement can cause misaligned cuts and irregular panel placement. Take extra care to verify dimensions before making any markings or cuts—precision at this stage will save you time and effort later on.
-
Secure workpieces properly: Before cutting, ensure that your hardboard panels are securely fastened down using clamps or other suitable methods. This prevents movement during cutting and minimizes mistakes caused by shifting materials.
-
Practice safe cutting techniques: Prioritize safety by wearing appropriate protective gear like goggles and gloves while operating power tools. Additionally, follow manufacturer instructions for tool usage and maintain awareness of potential hazards throughout the process.
By adhering to these guidelines, you can enhance your chances of achieving accurate cuts and a successful installation overall.
Common mistakes to avoid during the measuring and marking process
Section H2: Common mistakes to avoid during the measuring and marking process
Transitioning smoothly from the previous section on tips for precise cuts, it is important to understand that even with careful cutting, a project can still go awry if errors are made during the measuring and marking process. To illustrate this point, let’s consider an example. Imagine you are installing hardboard siding on your home and have meticulously cut each piece according to your measurements. However, due to inaccurate markings or misalignment, when you start attaching the pieces together, you notice inconsistencies in their positioning. This can result in an uneven appearance and compromise the overall quality of your installation.
To ensure a successful exterior hardboard installation, it is essential to be aware of common mistakes that often occur during the measuring and marking phase:
-
Neglecting precision: Rushing through measurements or relying solely on rough estimates can lead to inaccuracies. It is crucial to use appropriate tools such as a tape measure or level to obtain accurate dimensions.
-
Failing to account for material expansion: Hardboard expands and contracts with temperature changes and moisture exposure. Ignoring this fact during measurement may cause issues later on, resulting in buckling or warping of the siding.
-
Overlooking obstructions: Not taking into consideration existing obstacles like windows, doors, or electrical outlets can lead to ill-fitting panels. Properly accounting for these elements ensures a seamless integration of the siding with other architectural features.
-
Disregarding layout planning: Before starting any installation work, carefully plan out how each panel will align with others around corners or edges. Poor layout decisions may create visual discontinuity or require unnecessary adjustments down the line.
By avoiding these common mistakes and employing proper techniques throughout the measuring and marking process, you can achieve a more symmetrical and visually appealing outcome for your exterior hardboard installation project.
| Common Mistakes During Measuring & Marking | Effects on Installation |
|---|---|
| Neglecting precision | Inaccurate dimensions |
| Failing to account for material expansion | Potential warping |
| Overlooking obstructions | Ill-fitting panels |
| Disregarding layout planning | Visual discontinuity |
Remember, the key to a successful installation lies in taking the time and care needed during the measuring and marking phase. By doing so, you can avoid unnecessary setbacks and ensure an aesthetically pleasing result that enhances your home’s exterior.
Comments are closed.